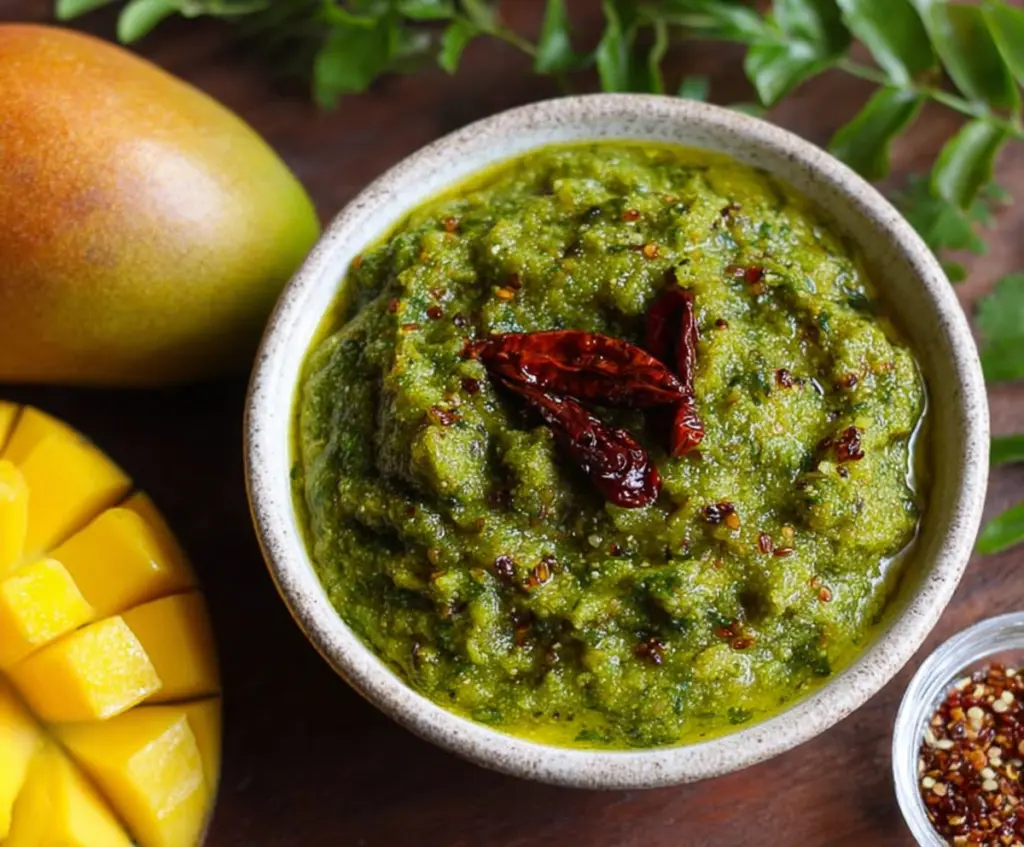
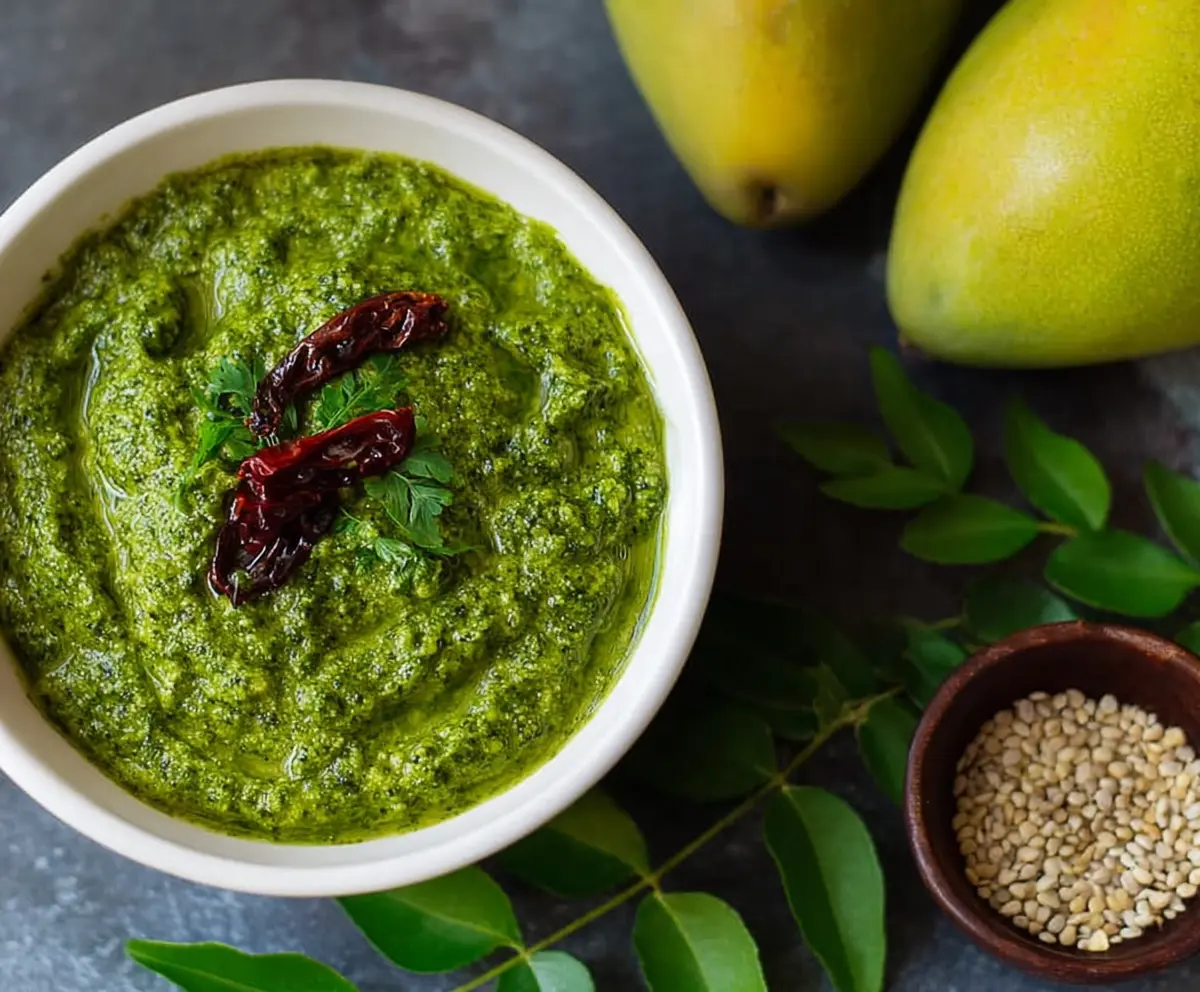
This Moringa Mango Chutney is a tasty blend of sweet ripe mangoes and nutrient-packed moringa leaves. It has a nice twist of tangy and spicy flavors that make it fun to eat!
You’ll love how easy this chutney is to whip up. I like to spread it on sandwiches or use it as a dip for snacks. Plus, it looks so vibrant on the table—everyone will want to try it!
Key Ingredients & Substitutions
Moringa Leaves: Fresh moringa leaves are key for that unique flavor. If you can’t find them, baby spinach or kale can work as alternatives, though the taste won’t be quite the same.
Mango: Use a ripe, sweet mango for best results. If fresh mango isn’t available, a canned variety can work, but be sure to drain it well to avoid excess water.
Onion: A small onion adds sweetness. Red onions can substitute well, or even shallots for a milder flavor.
Dried Red Chilies: These give a smoky flavor. If you prefer less spice, try using paprika or omit them altogether. You can also adjust the heat by using fresh green chilies instead.
Jaggery: It adds a rich sweetness that’s traditional in chutneys. Brown sugar can easily replace it, although you might miss that unique earthy taste.
How Do You Get the Best Flavor When Cooking the Ingredients?
The key to boosting flavors in this chutney lies in how you cook the ingredients. Start by heating oil and letting the mustard seeds pop; this releases essential oils and flavors.
- Use medium heat and don’t rush the onions; sauté them until translucent, allowing sweetness to develop.
- When adding the moringa leaves, ensure they’re wilted but still vibrant to keep some texture and nutrients.
- Let the mango cook just enough to soften but preserve some chunks for a delightful texture.
Remember to blend just until your desired consistency is reached, whether coarse for texture or smooth for a dip-like feel. This gives you control over the final chutney’s mouthfeel!
How to Make Moringa Mango Chutney
Ingredients You’ll Need:
For the Chutney:
- 1 cup fresh moringa leaves, washed and chopped
- 1 ripe mango, peeled and chopped
- 1 small onion, chopped
- 2 dried red chilies
- 1 tsp mustard seeds
- ½ tsp turmeric powder
- 1 tbsp grated ginger
- 1-2 green chilies, chopped (optional, for extra heat)
- 1 tbsp jaggery or brown sugar (adjust to taste)
- 1 tbsp lemon juice
- Salt to taste
- Water as needed
For Cooking:
- 2 tbsp oil (mustard oil or vegetable oil)
How Much Time Will You Need?
This chutney recipe takes about 10 minutes of prep time and 20-25 minutes of cooking time, making it a quick and easy addition to your meals. You’ll have a delicious chutney ready in under an hour!
Step-by-Step Instructions:
1. Splutter the Mustard Seeds:
Start by heating 1 tablespoon of oil in a pan over medium heat. Once the oil is hot, add the mustard seeds. Let them cook until they begin to splutter, which releases their flavor into the oil.
2. Fry the Dried Red Chilies:
Next, add the dried red chilies to the hot oil. Fry them for about 30 seconds until they become fragrant. This will give a nice smoky flavor. Remove them from the pan and set them aside for garnishing later.
3. Sauté the Aromatics:
In the same pan, mix in the chopped onion, grated ginger, turmeric powder, and green chilies if you’re using them. Sauté these ingredients until the onions become translucent; this usually takes about 3-4 minutes.
4. Add the Moringa Leaves:
Now, add the chopped moringa leaves to the pan. Sauté everything together for about 3-4 minutes until the moringa leaves wilt down nicely.
5. Incorporate the Mango:
Time to add the chopped mango pieces! Stir in the mango along with jaggery (or brown sugar) and salt. Mix everything well and let it cook for another 5 minutes until the mango softens.
6. Create the Right Consistency:
If the mixture looks too dry, add about ¼ cup of water. This helps blend all the flavors harmoniously. Cook for an additional 3-5 minutes, stirring occasionally.
7. Cool It Down:
Once cooked, remove the pan from the heat and let the mixture cool slightly. This makes it easier to blend.
8. Blend the Chutney:
Transfer the cooled mixture to a blender. Pulse it to your preferred consistency—coarse for texture or smooth for a dip-like feel.
9. Add the Finishing Touches:
Stir in the lemon juice and taste to see if you need to adjust the salt or sweetness.
10. Prepare the Tempering (Optional):
For an extra flavor boost, heat another tablespoon of oil in a small pan. Add the reserved dried red chilies and fry until they are crispy. Drizzle this tempering over your chutney.
11. Serve and Enjoy:
Your Moringa Mango Chutney is ready to be served! Enjoy it as a side with rice, dosa, or your favorite snacks. It can be stored in the refrigerator for up to a week, but I bet it won’t last that long!
Can I Use Fresh or Frozen Moringa Leaves?
Fresh moringa leaves are ideal for this recipe, providing the best flavor and nutrients. If you can’t find them, you can use dried moringa leaves, but reduce the amount since they are more concentrated. Frozen moringa leaves can also work; just ensure they are fully thawed and chopped before using.
What Can I Substitute for Jaggery?
If you don’t have jaggery, brown sugar is a great alternative. Maple syrup or coconut sugar can also be used, but start with a smaller amount and adjust to your taste, as these sweeteners can vary in sweetness.
Can I Make This Chutney Spicier?
Absolutely! You can increase the amount of green chilies or add a pinch of red chili powder for extra heat. Just remember to taste as you go, so you achieve your desired spice level without overpowering the dish!
How to Store Leftover Chutney?
Store any leftover chutney in an airtight container in the refrigerator for up to a week. To extend its shelf life, consider freezing it in small portions; it can last for up to three months in the freezer. Just thaw in the fridge before using!