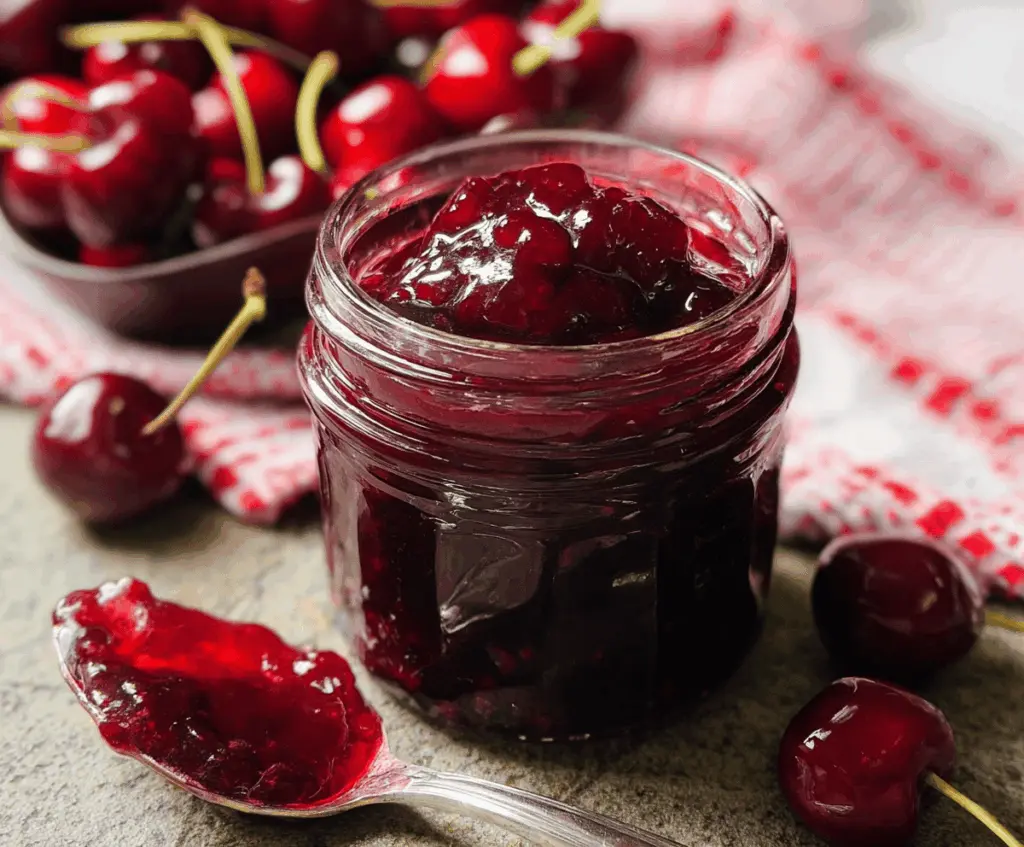
This delightful cherry vanilla jam is a burst of fruity goodness! With just a handful of sweet cherries and a hint of vanilla, it makes breakfast feel special.
Making this jam is a breeze! I love spreading it on warm toast. You might just want to grab a spoon and enjoy it straight from the jar! 😄
Key Ingredients & Substitutions
Cherries: Use fresh, ripe cherries for the best flavor. If you can’t find cherries, you can substitute with frozen cherries. Just thaw and drain them well before use.
Sugar: Granulated sugar is standard for this recipe. If you’re looking to reduce sugar, try using a sugar substitute like agave, but keep in mind this might change the texture.
Lemon Juice: Freshly squeezed lemon juice adds a nice tartness that balances the sweetness. If you don’t have fresh lemons, bottled lemon juice works too. Just avoid the concentrated kind!
Vanilla Extract: Real vanilla extract is wonderful, but if you’re in a pinch, vanilla essence can be used instead. For a fun twist, consider adding a split vanilla bean while cooking for a more intense flavor.
How Do You Get the Right Consistency for Jam?
Getting the consistency just right can be tricky, but here’s how to nail it:
- Start cooking your cherry mixture over medium heat and keep stirring to prevent it from sticking.
- As the jam simmers, it will begin to thicken after about 20 minutes. Use a spoon and run your finger through the jam; if it stays parted, it’s ready!
- If the jam seems too watery, continue boiling until it thickens. If it’s too thick, add water gradually to reach your desired consistency.
- As a final check, put a spoonful of jam on a cold plate. After a minute, run your finger through it; the jam should hold its shape without running back together.
With practice, you’ll perfect your jam-making skills!
Easy Cherry Vanilla Jam
Ingredients You’ll Need:
- 4 cups fresh cherries, pitted (about 2 pounds)
- 2 cups granulated sugar
- 2 teaspoons fresh lemon juice
- 1 teaspoon vanilla extract
- 1/2 cup water (optional, for cooking)
How Much Time Will You Need?
This easy cherry vanilla jam recipe takes about 30 minutes to prepare and cook. Allow a bit more time for cooling and storing, making it a fun afternoon project!
Step-by-Step Instructions:
1. Prepare the Cherries:
Start by rinsing the fresh cherries under cool water. Pit each cherry and chop them roughly if you prefer a chunkier jam. This will help release more juices as they cook!
2. Combine Ingredients:
In a large pot, combine the pitted cherries, granulated sugar, and lemon juice. Stir everything together well. Let the mixture sit for about 10 minutes; this will allow the cherries to release their natural juices.
3. Cook the Mixture:
Place the pot on the stove over medium heat. Bring the mixture to a boil while stirring frequently to prevent anything from sticking to the bottom. Keep an eye on it!
4. Simmer and Thicken:
Once boiling, lower the heat and let the mixture simmer gently for 20-25 minutes. Stir occasionally. If at any point it looks too thick or starts to stick, feel free to add a splash of water (up to 1/2 cup) to loosen it. This should not interfere with the jam’s flavor!
5. Skim Off Foam:
As the cherries cook down, you may notice some foam forming on the surface. Use a spoon to gently skim this off to keep your jam smooth and nice.
6. Check Consistency:
When the jam has thickened to your liking (it should coat the back of a spoon nicely), it’s time to remove it from the heat!
7. Add Vanilla:
Stir in the vanilla extract for a delicious aroma and enhanced flavor that pairs beautifully with the cherries.
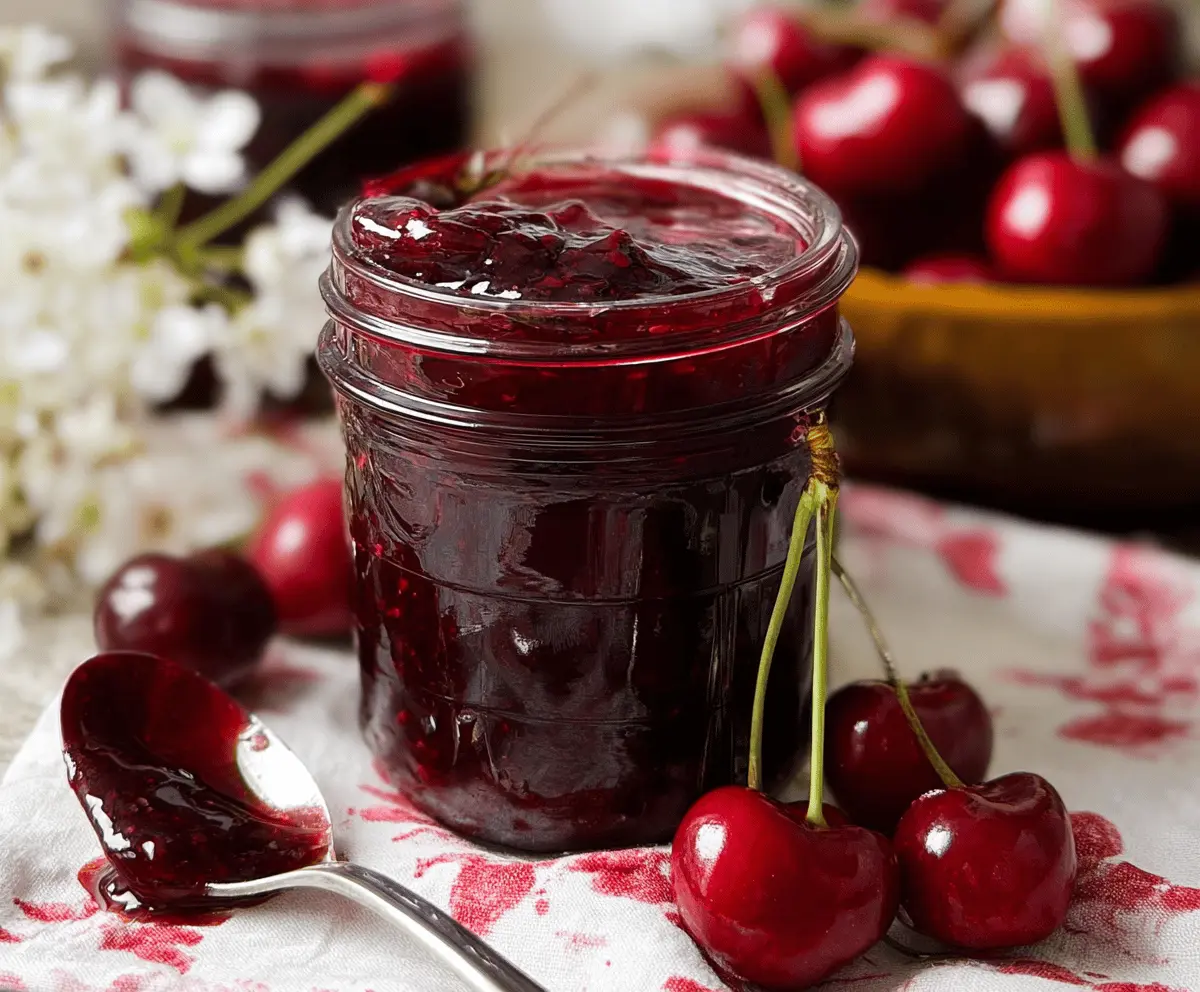
8. Cool and Store:
Let your jam cool slightly. Then, pour it into sterilized jars while still warm. Seal tightly. You can store your jam in the refrigerator for up to 3 weeks. If you want to keep it longer, process the jars in a water bath canner to properly preserve the jam for future use.
Enjoy this luscious cherry vanilla jam spread on toast, swirled into yogurt, or dolloped over ice cream! It’s a sweet treat that brings a smile to every bite!

FAQ for Easy Cherry Vanilla Jam
Can I Use Frozen Cherries for This Recipe?
Absolutely! Frozen cherries work well as long as you thaw and drain them to remove excess moisture. They may need a little extra cooking time to break down fully.
Can I Reduce the Sugar in This Jam?
Yes, you can reduce the sugar! Just remember that sugar not only sweetens but also helps with preservation. If using less sugar, consider adding a bit of pectin to help the jam set properly.
How Do I Know When the Jam is Done Cooking?
A quick test is to coat the back of a spoon with jam; it should hold its shape when you run your finger through it. You can also place a spoonful on a cold plate and check if it firms up once cooled.
How Should I Store This Jam?
Store the jam in airtight jars in the refrigerator for up to 3 weeks. For longer storage, process the filled jars in a water bath canner to ensure they’re sealed properly and enjoy it for several months!