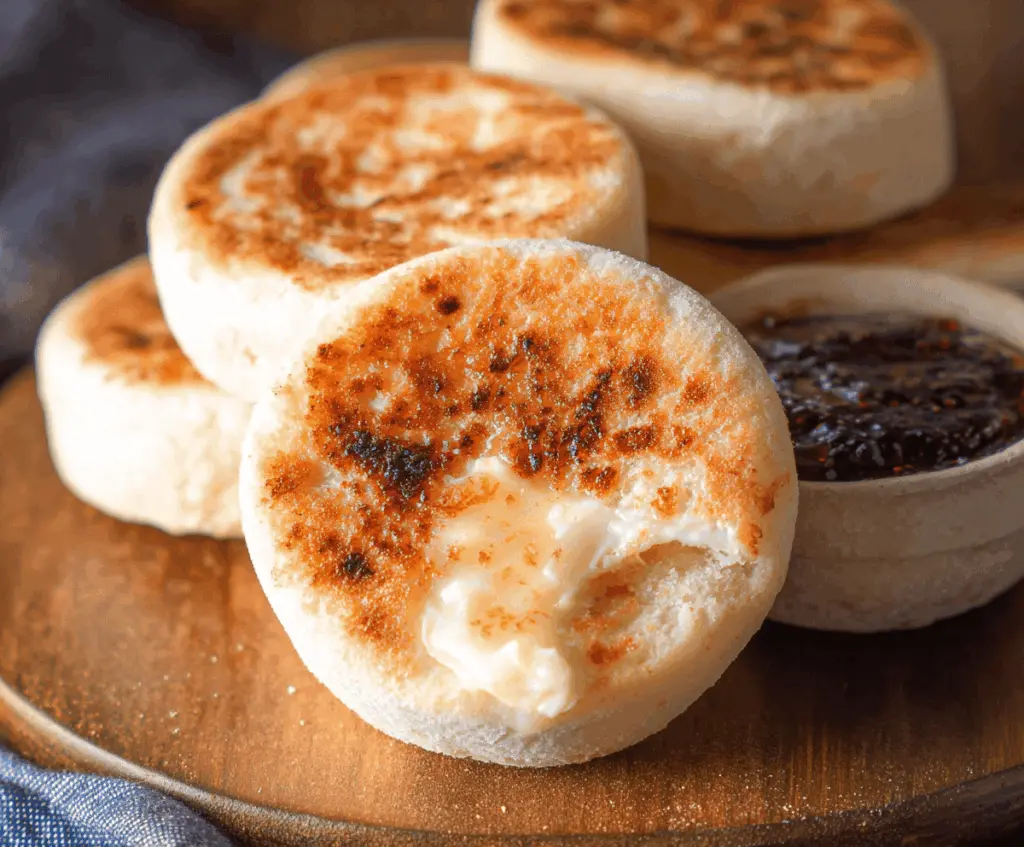
These easy homemade English muffins are a breakfast treat you can’t resist! With their lovely nooks and crannies, they’re perfect for holding butter and jam.
Making them at home is so rewarding! I can never eat just one—especially when they come warm from the toaster. Give them a try; your mornings will thank you! ☀️
Key Ingredients & Substitutions
Active Dry Yeast: This is crucial for the rise and fluffiness. If you don’t have it, you can use instant yeast instead, but check the conversion on the package, as the amount may be slightly different.
Warm Milk: Milk adds richness. If you’re dairy-free, almond or oat milk works great. Just ensure it’s warm—not hot—to keep the yeast happy.
Sugar: This helps the yeast activate and adds a touch of sweetness. If you’re looking for a healthier choice, honey or maple syrup can be swapped in.
All-Purpose Flour: This is your standard flour for the muffins. You could use whole wheat flour for a heartier muffin, but consider adjusting the liquid slightly, as whole wheat absorbs more moisture.
Cornmeal: It creates a crunchy bottom and prevents sticking. If you don’t have cornmeal, use flour to dust the baking surface or consider semolina for a different texture.
How Do I Get Perfectly Craggy English Muffins?
The secret to those delightful nooks and crannies lies in the dough preparation and cooking technique. Here’s how to nail it:
- Make sure your yeast is fresh and active; it should foam in the warm milk.
- After kneading, let the dough rise until it’s doubled. This is key for a light texture!
- Roll out the dough gently and don’t overwork it when cutting. Press down with the cutter, but don’t twist it as that seals the edges and restricts rising.
- Cooking on a low to medium-low heat is essential. This allows them to cook through without burning the outside.
Follow these tips, and you’ll have perfectly craggy English muffins that are a joy to toast and spread!
Easy Homemade English Muffins with Perfect Crannies
Ingredients You’ll Need:
- 2 teaspoons active dry yeast
- 1 cup warm milk (about 110°F/43°C)
- 2 tablespoons sugar
- 1/2 teaspoon salt
- 2 1/2 cups all-purpose flour (plus more for dusting)
- 2 tablespoons melted butter or vegetable oil
- Cornmeal, for dusting the baking surface
How Much Time Will You Need?
This recipe will take you about 2 to 2 1/2 hours in total. You’ll need about 20 minutes for preparation and shaping, and the rest is for rising the dough. Patience will reward you with delicious muffins!
Step-by-Step Instructions:
1. Activate the Yeast:
In a small bowl, mix together the warm milk, active dry yeast, and sugar. Stir it gently and let it sit for about 5-10 minutes until it becomes frothy. This shows that your yeast is alive and ready to help your muffins rise!
2. Prepare the Dry Ingredients:
In a large mixing bowl, whisk together the all-purpose flour and salt until they are well combined. This ensures even distribution of salt and flour in your dough.
3. Combine Ingredients:
Pour the frothy yeast mixture and melted butter or vegetable oil into the bowl with flour. Mix everything using a wooden spoon or dough hook until a sticky dough forms. Don’t worry, it’s supposed to be a bit tacky!
4. Knead the Dough:
Turn the sticky dough out onto a floured surface. Knead it for about 8-10 minutes until the dough is smooth and elastic. If it’s too sticky, add just a little flour, but keep it soft for the best muffins.
5. First Rise:
Place your kneaded dough in a lightly oiled bowl, and cover it with a clean kitchen towel or plastic wrap. Let it rise in a warm place for about 1 to 1 1/2 hours until it’s doubled in size. Go do something fun while you wait!
6. Shape the Muffins:
After the dough has risen, gently punch it down to release the air. Roll it out on a floured surface to about 1/2-inch thickness. This will shape the muffins perfectly.
7. Cut Out Muffins:
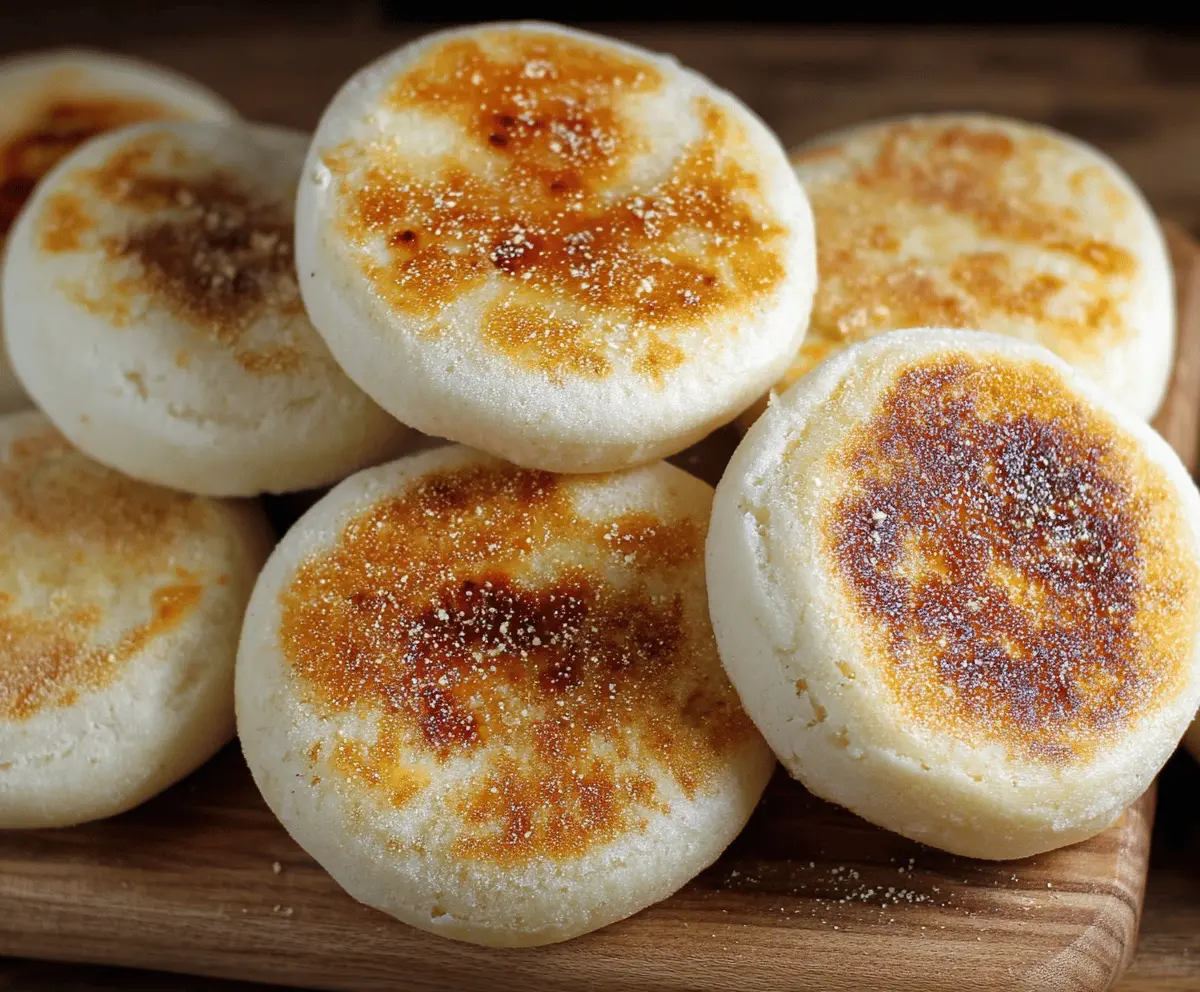
Use a round cutter (about 3 inches) to cut out circles from the dough. Place them on a baking sheet dusted with cornmeal. Lightly sprinkle the tops with more cornmeal to add texture.
8. Second Rise:
Cover the cut-out muffins lightly and let them rise again for 30-45 minutes until they look puffy. This helps them get light and airy.
9. Cook the Muffins:
Heat a cast iron skillet or heavy-bottomed pan over low to medium-low heat. Carefully transfer the muffins to the skillet, working in batches to avoid overcrowding. It’s all about patience here!
10. Brown Both Sides:
Cook the muffins for about 7-8 minutes on each side, turning them carefully with a spatula. You want them to be golden brown with a lovely caramelized look.
11. Cool Down:
Once the muffins are cooked, let them cool on a wire rack. For the best texture, split them with a fork or gently with your hands to showcase those wonderful nooks and crannies.
12. Toast and Serve:
Before you enjoy, pop the muffins in the toaster for a quick toast. Serve them warm with butter, jam, or your favorite toppings. They’re simply delightful!
Enjoy your homemade English muffins with their signature soft texture and perfect crannies that soak up butter and spreads beautifully!

Can I Use Whole Wheat Flour Instead of All-Purpose Flour?
Yes, you can! However, whole wheat flour will yield a denser muffin. You may need to slightly increase the liquid in the recipe since whole wheat absorbs more moisture.
How Should I Store Leftover English Muffins?
Store any leftover muffins in an airtight container at room temperature for up to 3 days. You can also freeze them; just slice in half, wrap individually, and store in a freezer bag for up to 3 months. To enjoy, toast from frozen!
What If My Yeast Doesn’t Foam?
If your yeast mixture doesn’t foam after 10 minutes, it may be inactive. This can happen if the yeast is expired or the water was too hot or too cold. It’s best to start over with fresh yeast to ensure your muffins rise properly.
Can I Make the Dough Ahead of Time?
Absolutely! You can prepare the dough and let it rise, then shape the muffins and refrigerate them overnight. Just remember to allow them to warm up and rise again before cooking them the next day.